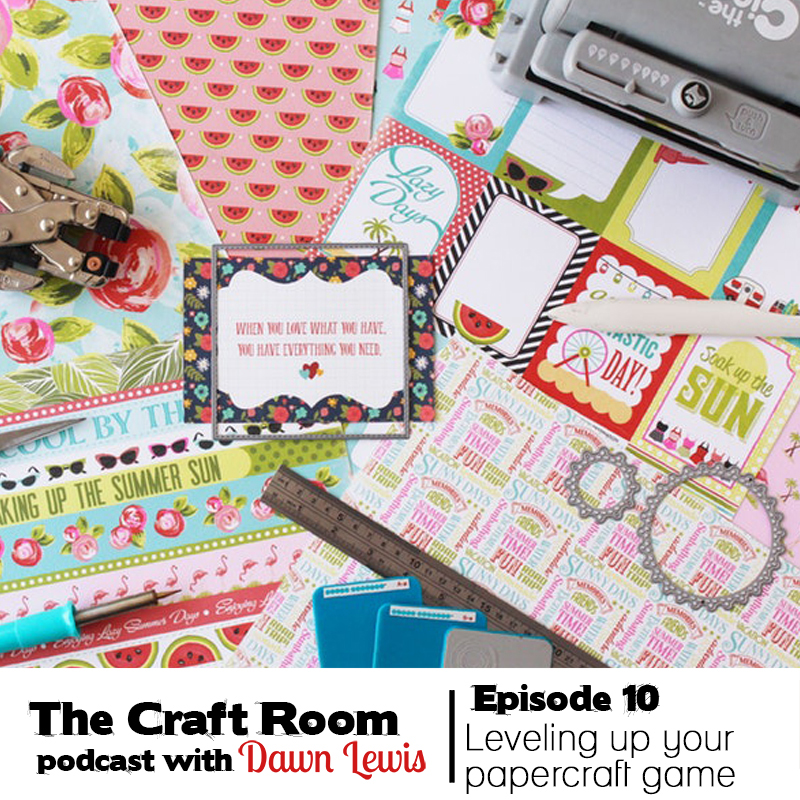
Today I’ve been thinking about one of the most common questions I see in Facebook cardmaking groups … “I’m new to cardmaking, what should I buy?”. The answers always intrigue me. Everyone is so passionate about what they think is the best tool or most useful thing to have, and I really love seeing everyone being so helpful to those who are new to the craft. However, while the answers come from a place of pure enthusiasm, they’re not always going to be what the person who has asked the question actually needs. I think, when we’ve been cardmaking or scrapbooking for a long time, we forget how we started, and so the recommendations are often items that aren’t quite appropriate for a beginner. Also, we are all really different, with different budgets, different size spaces and storage capacity, different tastes and different needs. One person’s essentials may be another person’s waste of money.
In one cardmaking group I belong to, there is a running thread in an album that is an excellent resource for members. When I considered the question, and thought about what I would recommend, I realised that I started with the basics. Over the years I have levelled up as I discovered new products and techniques, my needs and space and tastes changed and I figured out what I liked. My contribution to that thread was pretty comprehensive, so I thought I would share it here on the podcast (in a LOT more detail), as it might come in handy for those of you who are just starting in the fun world of papercraft. For those of you who aren’t papercrafters, feel free to stick around, as I’ll be discussing some of the reasons when, how and why we level up, which is appropriate to a bunch of other crafts.
I started where everyone starts … Level 1 – Absolute Beginner
Back in Episode 2, I talked about the top 6 things you need to begin cardmaking, and in Episode 3, I talked about the top 5 things you need to begin stamping. Here’s a link …
CLICK HERE for The Craft Room Podcast Episode 2
CLICK HERE for The Craft Room Podcast Episode 3
And … for the quilters … Marni Franks from Frankensteins Fabrics joined me in Episode 5 to discuss her top 10 must-have items to begin making a quilt top. Here’s that link …
CLICK HERE for The Craft Room Podcast Episode 5
When you’re starting out, there’s really not very much you NEED to start making cards, scrapbooking, art journals, quilts, or whatever it is that you’re into. I don’t know anybody who starts with ALL the tools, because, honestly, the cost is prohibitive, and who has space for all that stuff when you don’t even know what you’re doing yet?
So here’s me .. back when I started, about 30 years ago, at level one as a cardmaker. I sourced most of my supplies at the big Stitches & Craft Show, which I would attend religiously twice a year after saving my craft pennies for six months. I was into stamps pretty much straight away, and I was super careful about what I spent my money on. In my cardmaking box (yes, everything fit into one box … incredible!) I had …
Cardstock – white, black, coloured
Speciality papers
Cutting Tools – craft knife, ruler, self healing cutting mat
Stamps
Ink pads – black and coloured
Adhesive
Scissors
Punches
We are talking very late 80’s / early 90’s, and there was nowhere near the range available then as there is now. No clear stamps, so no need for an acrylic block. This is actually quite close to the list that I recommend for now, so I wasn’t far off the ideal set-up. I rarely use punches now, but back then I used them all the time. It was the trend of the time, punches were readily available, and nobody had die-cutting machines … I’m not even sure if they were on the scene at all yet. I was able to create cute cards, quickly and easily. I chose items that I felt I would get a lot of use out of, and I was happy creating cards in my spare time. Until the inevitable happened. I started getting bored with my supplies. I was so sick of using the same few punches and stamps over and over … and then new products started being shown at the craft shows.
That’s when I got the itch and took the leap into … Level 2 – Heat Embossing
I already had stamps and ink pads, so heat embossing was a natural next step for me. Do you remember the first time you saw heat embossing in action? I do! It was like magic, and my brain was full of ideas, entranced by the possibilities that this magical powder presented! I started with a basic kit … it had a clear embossing ink pad, and a few embossing powders (I think I started with clear, gold, silver and copper). The problem was that heat guns were really expensive, and a bit hard to find back then. I was determined to find a solution that wasn’t going to take half a weeks pay, and can tell you that even though a hairdryer might seem like a good solution … it is not!
What I ended up using was the toaster! It worked really well, and I made do with a toaster for a very long time … seriously … over a decade! If you are on a tight budget, and a heat gun isn’t in your future, then I recommend giving the toaster heat embossing method a try. I did learn some important tips that you need to know before you start, and I will endeavour to make a video showing how this works very soon (and when I do, I’ll come back here and add the link to the show notes). If you are going to use a toaster, there are some things you should know.
First you need to empty all the crumbs out of the toaster. You don’t want to set off the smoke alarm or make your house smell like burnt toast.
Second, take note of where the toast level setting is before you start. Mark it with tape or photograph it. It took a long time to decide on that perfect level of toastiness, and if you don’t put it back, someone is going to be cross.
Thirdly, you’re going to need long tweezers or secure tongs to hold your piece of cardstock, because it is going to get really hot really fast, and you do not want your fingers that close to that much heat. Bonus points if the tongs or tweezers have some silicone, because metal will get super hot as well, and you’ll still possibly burn your fingers.
Stamp your image with clear embossing ink, sprinkle over the powder, tap off the excess onto a piece of paper (so you can pour it back into the jar), and brush off any loose powder that’s sticking where it shouldn’t be. We will talk about that I a minute.
Put your stamped & powdered piece of cardstock to the side, pour the excess powder back into the jar and put the lid on! We don’t want to accidentally knock the whole thing over when the toaster pops up and gives us a fright!
You’ve prepped your piece, you’ve prepped your toaster. Turn the toaster heat setting up to full, and press the lever down … obviously without any bread in your toaster. Hold the cardstock over the toaster, at least 5cm above, with the stamped & powdered side up. Constantly move it around so that you don’t set your cardstock on fire or scorch it. It will take a little while, but soon you will see the embossing powder begin to melt. When you’re done, if the toaster hasn’t already timed out, pop the lever back up. And when you’re completely finished, put the setting back to the way it was, lest you incur the wrath of someone who is unhappy with burnt toast!
I mentioned before about embossing powder being where it shouldn’t be, and this is where I will add 2 items to this level list. An anti-static powder tool is an excellent thing to have, as it stops powder sticking where it shouldn’t. You can purchase one or make your own. The last item would be a fine paintbrush. I have one that I keep in my papercraft tool caddy, which I only use for embossing powder.
Now, of course the next question is … what colour embossing powders should I buy? It depends very much on what you like. If you really don’t like silver, then don’t get silver. If you don’t like gold, then don’t get gold. Get the colours you like! However, here’s a handy tip … if you already have coloured ink pads (especially if they are pigment ink pads), then you don’t need to buy a bunch of coloured embossing powder. One of my favourite things to do in those early days was to stamp with coloured pigment ink, sprinkle over clear embossing powder, and heat set that. I had the colour, I had the dimension and the gloss, but I didn’t have to spend my limited craft funds on lots of bottles of embossing powder. To this day, I mostly use silver, gold, copper, clear and clear with sparkles.
I was well and truly hooked, and started Scrapbooking, which lead to … Level 3 – Embellishments
Ooooooh my goodness. This is where it is tempting to go absolutely crazy. These days I rarely use embellishments on my cards, but I used to use them a lot when I was scrapbooking, so I have a very generous collection in my stash. I started small, with brass split-pins which my dad smuggled home from work for me once. Some embellishments you might be tempted by are …
Coloured & metallic brads / splitpins
Eyelets
Buttons
Twine
Ribbon
Paper doilies
Paper and silk flowers
Fancy mesh ribbons
Adhesive gems
Adhesive pearls
Sequins
Beads
Shaped paper clips
Mini tags
Coloured hot glue sticks
… and I’m sure there are a lot more that I haven’t covered.
It’s when you’re on this level that you are 100% sure that this is a craft you want to do for a long time … you’re all in! You’re also likely in a phase where you’re crafting late at night, and if you’re making a big project, you want to be able to finish it without doing any online shopping (and the waiting that goes along with that), or stall because your local craft store is closed. This is when you really start stash-building.
For me, this was the phase when I was also on a really tight budget, and so I discovered that I could get some basics at the dollar shops that were popping up everywhere. Some things I bought were great prices, and great value for those prices. This was the level when I learned (the hard way) the difference between cheap and cheerful, and cheap and nasty. There’s nothing wrong with grabbing a bargain, but if it’s something you never use, it’s not a bargain at all … it’s a waste of money. So be discerning when you purchase dollar store items. When you have a reaction like “How is this a whole $2? Ewwwww”… that’s cheap and nasty. When your reaction is more like “How is this only $2? It’s so gorgeous! Maybe it’s a mistake and they received a box from Lincraft by accident” … then that is cheap and cheerful. I have a whole video that showcases 10 cards I created, which I’ve linked below …
CLICK HERE for dollar shop card video
My last pro tip would be … don’t go overboard buying embellishments. Trends change, your tastes change, there will always be something new. If you buy a bag of 52 printed die-cuts, but only use one or two, the rest are just going to sit in your stash, which is a waste of space and money. If you really must have that 52 die-cut pack, plan to use all or most of them straight away, and finish that project before you go and buy more.
This leads us very nicely into Level 4 – Die-cutting & raised embossing
I had been papercrafting for a VERY long time before I was finally convinced that it would be good value to buy my own die-cutting machine. I had moved into scrapbooking, and specialty scrapbooking stores were opening up all over the place. I had started teaching at my local scrapbooking store (this would be about 16 years ago), and met one of my most awesome friends. Through her I was introduced to the wonderful world of papercrafting swaps. Oh boy! I became a hard-core serial swapper, which gave me so many wonderful excuses to pop into the scrapbooking store and make oh so many purchases. Another friend had invited me along to a weekend crop, and it was tons of fun. Around this time, Sizzix came out with a home diecutting machine. There was a big commercial one at the local store that anyone could pay to spend time on, which was great. Why would I need my own at home when I could use the one at the store AND use their dies for such a tiny price? But it was at one of those weekend crops that someone had their Sizzix machine with them … and when they let me have a go, I realised that I could actually get a lot of use out of one of these. It still took over a year for me to take the plunge and invest in such an extravagant purchase, but I’m very glad that I did. I was at a stage where I preferred to make my own embellishments from scratch, and was starting to see that if I invested in tools with multiple uses, I could get better value than purchasing ready-made items that were single use.
It was a pretty exciting day when I bought my first Sizzix machine. It was the old school pull-down handle one, which took thick dies and Sizzlets, the thinner dies that preceded the wafer thin metal dies that are most common today. The bonus was that I could use embossing folders in the machine, so it really pulled double duty, and helped me really get my moneys worth from it.
There is something, though, that you kind of don’t realise when you purchase your first die-cutting machine … you have to feed it! As with everything, you get bored with using the same old alphabet die over and over again … you want variety! So you are constantly adding new dies to your collection. I figured out I could create handmade embellishments to sell on ebay in the early days of the internet. It was great, because I was getting maximum use out of my tools, and was able to boost my Paypal account, and use my earnings to fund my next round of die purchases.
I did upgrade to a Sizzix Big Shot about 6 years ago, just because all of my new dies were wafer thin metal dies, and my old Sizzix just wasn’t up to the job, even with the converters … it was just too hard to make it work.
So … what do I recommend someone entering Level 4 now should buy in the die-cutting / raised embossing arena? Well … that depends very much on the individual, and I have some tips to help you decide …
* Take your budget into consideration, as there are a lot of choices to fit most budgets.
* How much space do you have for a die-cutting machine? They can take up a lot of space, so if your workspace is small, look for one that folds up.
* What exactly do you want to die-cut? Do you really need dies for every stamp set? Because that can be very expensive. If you like to fussy cut your stamps without the hassle of scissors, perhaps a Brother Scan N Cut would be a better option. Sure, it’s a bigger outlay, but if you add up the cost of coordinating dies over the years, it may be better value.
* Perhaps start with some basic, yet versatile dies, like rectangles, circles or ovals. Do you prefer the look of a plain cut circle, or one with faux stitching or tiny pierced holes?
* Do you prefer to stamp your sentiments, or would you get use from some commonly used word dies, like Happy Birthday, Get Well or Congratulations.
* Which embossing folders should you get? How about starting with one that’s simple, like tiny dots or stripes, seeing if you enjoy using it, and going from there.
Whatever you choose, make sure it’s something you will use over and over again. There are lots of ways to use your dies. Naturally you can cut them out, but if you add an embossing mat, you can just make an impression with them, which opens up a whole new world of techniques!
CLICK HERE FOR embossing mat
All too soon I hit Level 5 – MUST HAVE MORE STAMPS
It all started with a Stampin’ Up demonstration at a friends house. As we all sat round admiring our gorgeous work and these incredible products, I remember saying … “One of us needs to sign up”. And one of us did (and no, it wasn’t me). This was when I started collecting stamps with much more ferver. I mean … I was supporting my friend in her new business, my kids were older, so I had more time to craft, and not only were the designs getting better and better, but I was finding that stamps were becoming more and more affordable. Acrylic stamps were hitting the shops, and while I’m not a big fan of acrylic because of the work you need to put in to get a decent impression from them, I was a fan of the price point!
I did give a lot of stamping advice back in episode 3, but I feel some of it bears repeating. These days, when you add stamping to your repertoire in a big way, there are some things to keep in mind.
* Really think about the occasions that you make cards for, and buy sets that you can use for those.
* When you look at a stamp set, can you immediately think of at least 3 different ways you could use it?
* Versatility is everything. Go for stamps you can use for a variety of ages and occasions as well as with a variety of techniques.
* Are you falling in love with Christmas stamps and buying them all, only to realise that you don’t actually make Christmas cards? You have two options here … stop buying Christmas stamps or start making and sending Christmas cards!
* Consider quality. If you are going to be stamping a lot, go for quality. I always steer clear of acrylic and silicone these days because the quality just isn’t there, and they are entering into the realm of cheap and nasty. A lot of cheap silicone stamps are counterfeit as well, which is devastating the many amazing stamp companies. I have torn many an acrylic stamp trying to remove it from the acetate, and had silicone stamps deteriorate so badly after a year or two that they just don’t stamp a good image. What a waste of money! Give me polymer or rubber stamps any day!
* Look at smaller sets. They’re a great price point, and you can often get a lot of use out of them. I have some video series on YouTube where I show you different techniques you can use with one stamps set. I’ve linked a few below.
This was also the point where I purchased my first stamp positioner … the Stamp-A-Ma-Jig. I still use it for my rubber stamps, and it did the trick for over a decade, helping me improve my stamp placement, and even double stamp if I needed to.
CLICK HERE for Love You A Latte (Lawn Fawn) video series
CLICK HERE for Bork (Ink Road Stamps) video series
CLICK HERE for Painted Rose (Concord & 9th) video series
It was for work that I delightedly moved up to Level 6 – Electronic die cutting machine
About 10 years ago, when I was working with Brandcorp, there was an Australian papercraft trade show called SIA. I was invited to contribute to the Brandcorp display, run a workshop, demonstrate and create a LOT of worked models for the company. It was TONS of fun, and I spent 2 days sitting in a stand across from Heidi Swapp, and was introduced to Copic markers for the first time … but we will get that that in an upcoming level (sufficed to say, there was NOT a lot of time between this level and the next).
To prepare all the kits for the workshop, I used part of my budget to purchase a Cricut machine. I had been playing with the original little Cricut at the store where I was teaching, and I was really impressed with it. By now I was savvy enough to know I would need to purchase more cartridges, but given the impressive variety and volume of designs I could cut from one cartridge, I realised I would really get a lot of use out of it. And I did! I used it to cut out all the pieces needed for the workshop, which was a paper flower topiary showcasing a new paper range and embellishments. I was allowed to keep the Cricut as part of my payment package, and I still have it today. I rarely use it now, just because, sadly, I don’t have a space where I can have it set up ready to use when the mood strikes. I know there are much more up to date versions, but I really love my pink 12×12 Cricut machine.
If you are considering an electronic die-cutting machine, there are a few different kinds, and it seems like there are always more coming out. I honestly can’t keep up! What I do know is that they fall into a few different categories.
* Electronic versions of a hand-crank machine, like the Big Shot or Vagabond.
* Cartridge-based machines.
* Computer-based machines.
* Scan N Cut … which literally scans a page full of stamped images, then cuts them out.
I confess … if I was going to invest in a new one, it would be the Brother Scan N Cut, just because it does the fussy cutting really quickly by literally scanning your stamped images, then cutting them out super fast! And right now, that’s pretty much all I want.
As I mentioned, I moved onto Level 7 very quickly – I must colour ALL THE THINGS
After being introduced to Copic markers 10 years ago, I very quickly realised that I wanted stamps I could colour in! For me, Copic markers are like painting with a marker, where I could achieve shadow and highlight, but with much less mess and faster drying times. I was instantly hooked, and was very fortunate to be introduced to Copics by an amazing Aussie colourist as well as Copic royalty, Marianne Walker and Lori Craig.
I had already been doing some watercolour with my Stampin’ Up ink pads, but this took it to a whole new level. Before long I did the certification course to become a Copic Certified Instructor, and convinced the owner of the store I was working in to add Copic markers to the shop. I was teaching classes within a couple of months, and Copics became a serious obsession.
There was a lot to love about them … they were refillable, the nibs were replaceable … the fact that they were designed to last me a lifetime really appealed to me. Plus they blend like a dream. I can colour embellishments to coordinate with my images … Maybe I need to do a Copic episode one day! Yes … let’s do that, or I’ll be stuck in a Copic loop for hours!
There are other mediums I like to use to colour my stamped images and figuring out how to colour with one led me to experiment and colour with others.
* Distress Inks (regular and oxide)
* Zig Clean Color Real Brush Markers
* Prismacolor Pencils
* I’ve been known to use Acrylic paint for some digital stamps that I’ve transferred onto canvases
… but I always come back to Copics.
By the time I was presenting segments on Scrap It TV, I was firmly into Level 8 – Stamping is my life now!
Stamping is not only fun, relaxing and creative, I also consider it to be an incredibly practical craft. I love making cards, I love sending cards, I love the communities around stamping and cardmaking, and I love the sense of accomplishment that comes from taking cardstock and ink and markers, and turning them into a mini piece of art that can help turn someone’s day around.
I love making videos to help people get the most from their stamps, and learn how to use all those fun supplies that jumped into their shopping basket and came home with them.
With stamping very firmly in my life, I have allowed myself to make some tool upgrades.
*Misti stamping tool. This is an expensive piece of kit, but given I was now working in the stamping industry, making lots of videos, making lots of cards, I needed to be more efficient, and the Misti did that for me. I was sick of throwing away cardstock because I’d mis-stamped it, and I wanted to be able to batch stamp. There are lots of different stamping platforms on the market now, so choose the one that fits your needs and your budget. I love that these tools make it possible for people with hand mobility issues to be able to stamp, whereas an acrylic block may have been difficult, frustrating or even impossible to use.
* Trimmers. I cycle between 3 different types of trimmers. I have an old Martha Stewart sliding blade trimmer, which I use when I need to cut a section out of a piece of card or paper, and it also doubles as a scoring tool. I use a Fiskars rotary blade trimmer for when I need to cut lots of paper or cardstock … it’s a really solid workhorse. And I use the Tonic Tim Holtz 8.5” Guillotine for trimming small bits and pieces.
* I recently upgraded my work surface to a Tonic Tim Holtz Glass Media Mat … and I love it! I can ink, and glue, and heat, and paint and cut on that surface and it takes all the punishment I can throw at it. It had become a bit of a pain swapping out my work surface constantly, switching out self healing mats, chopping boards and non-stick sheets.
As you can tell, I was all in … then I discovered a new level … Level 9 – Design Team member
I found blog challenges to be a great way to stretch myself, see what others were creating, and to discover new techniques. In my travels around the many blog challenges that were on offer, I came across a Design Team call-out. I had no idea there was such a thing! I applied to a few, with no luck, but one day a little shop in Canada took a chance on me, accepting me onto their Design Team. I have always enjoyed the challenge of working with limited supplies and within a theme or colour scheme boundary, so I took to Design Team work pretty quickly. It was a short term, and when I was done with that team, I was hooked! I went looking for other DT calls, and before long I was was a member of the KennyK Krafty Krew, a digital stamp company with a difference. I LOVED being on that team, and I ended up doing 2 DT stints for them. I have also been on Design Teams for Tiddly Inks and Little Miss Muffett Stamps, also digital stamp companies. Earlier this year I was on the Kindred Stamps Video Design Team, which is a brand I stock in my store. They make incredible fandom stamps … I’ll link to them in the shownotes because they are really cool! I met some wonderful people in my time on design teams, I was able to promote brands I truly loved, and try things I might never have tried before. It is a lot of work to be on a DT … there are deadlines to meet and guidelines to follow, so you need to be very organised and able to follow instructions.
I know a lot of people aspire to be on a Design Team, and I have a few tips if that’s something you’d like to do.
* Be sure to read the DT requirements thoroughly. If you don’t think you can meet the deadlines, best apply later when you have more time.
* Don’t be too disappointed if you aren’t accepted onto a DT first time around. They get hundreds of applications and usually only have a small number of places.
* Make a lot of stuff! If you post photos of your creations all the time to Instagram, then you’re building a great online gallery for stamp brands to view and get an idea of your style.
* Take great photos. Invest some time into learning how to take great photographs of your cards, as that can make a world of difference when applying to a DT.
* You don’t always have to have a blog, but it helps. You can start a blog for free, and there are loads of tutorials on YouTube to help you do that.
* If you aspire to be on the DT of one particular stamp company, use their products often, and tag them in every photo you post on Instagram. It makes your name familiar when DT application time rolls around.
It was during the final season of Scrap It TV that I moved, kind of accidentally into Level 10 – Stamp shop owner!
Honestly, this wasn’t something I had really ever thought about before, but I was such a hard-core stamper by now that I was looking at obscure brands in the USA that we just couldn’t get here in Australia. I asked a question, expecting a no … but got a yes, and before I knew it, I was a stockist for Sweet Stamp Shop. I had a background in selling handmade, and figured I’d just sell these stamps for a little while and see if anyone else was interested in them. Um … well … that was a few years ago, and I am still selling stamps today!
This is a pretty extreme level, and definitely not for the faint of heart, but it’s where I ended up, and I have to say … I’m really happy here.
So … what can we learn from all of this? Let’s go back to where I started, in the cardmaking Facebook group, where I see the same things come up over and over again.
* Wanting to be an instant expert. Sure … some people pick things up quickly, but for the grand majority, it takes time to build your skills. It’s just not possible to have all the supplies, and all the tools and know all the techniques straight away. Everyone wants to be an instant expert, but we all need to start at level 1, and just like in a video game, as you travel through each level, you become more dexterous, learn new skills, become better at them, and then you level up. It’s what I did. It’s what everybody does. It’s going to take time, and if you want to hear my thoughts on that whole journey from beginner to expert, then check out last weeks Podcast, episode 9, which I will also link to in the show notes.
CLICK HERE for Episode 9 podcast ‘Expectation vs Execution’
* Comparisonitis. If you start comparing yourself to other people, I would gently recommend that you stop doing that. You could be comparing the cards you’re making only 6 months into this new hobby to the cards someone else is making who has been doing this for 5 or 10 years (or more). It’s like comparing apples to oranges … it just can’t be done … there are way too many variables.
What it boils down to is this … it’s craft, and it’s meant to be fun. You will figure out your favourite techniques, your preferred style and tools that help you get the job done as you go along and level up. Maybe you will level up in a different order to me, maybe you will level up faster or slower than those around you, maybe you will hit a level you’re happy with and stay there forever … you do you, and make sure you’re having fun in the process!
CLICK HERE for my craft cupboard tour video