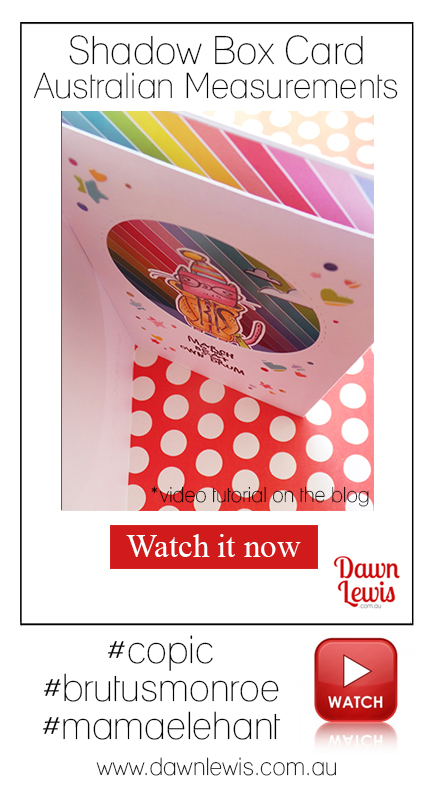
This shadow box card has been doing the rounds for a while, and it’s incredibly cool! I wanted to make one, but without any waste by cutting card to the USA A2 measurements. So, I reconfigured it and you can see all of the measurements in the video.
There is a bonus Copic colouring video, so if you’re keen to see how I coloured these gorgeous Brutus Monroe stamps, you can see that in the second video.
First, let’s take a look at the project …

MATERIALS
1 x Australian A4 cardstock (I used 250gsm)
Trimmer
Tim Holtz Travel Stamp Platform
Tsukineko Memento Tuxedo Black ink pad
Ranger Archival Jet Black ink pad
3mm double sided tape
Tombow Mono Liquid Glue
Bone Folder
Sizzix Big Shot die cutting machine
Stitched circle dies – 2.75″ and 3.25″
Scissors
COPIC
Clouds, beret, jacket, beanie stripes – B0000, B000, B00
Bunny – B23, B45, B37
Cat – R81, R83, R85
Beanie stripes, red – R14, R08
Beanie stripes, yellow – Y05, Y15, Y17
Green umbrella – YG01, YG03, YG05
Zipper & cords – V15, V17
Jacket – YR21, YR12, YR15
MEASUREMENTS
The Australian A4 cardstock measures 29.5cm x 21cm.
Cut it in half at 14.8cm (on the long side) to create 2 x pieces measuring 14.8cm x 21cm.
Piece 1 – the Card front/outer piece – score at 10.5cm (on the long side) and cut 1.3cm off one edge.
Piece 2 – the interior shadow box – score at 1.3cm, 10.5cm, 11.8cm. Trim a tiny sliver (1mm) off the flap. Cut the peekaboo window centred between the 1.3cm and 10.5cm score lines.
I cut a piece of pattern paper 9cm x 11cm and adhered it behind the area where the shadow box peekaboo hole would be. Adjust your lining to suit the size & shape hole you choose to cut to create your shadow box.
Of course, all of these measurements are useful, but to see how it all comes together, let’s check out the videos … first, the card construction with Australian measurements.
And for the fans of Copic colouring … this one is for you!
I hope you enjoyed this project, and if you make one of these fun cards, I hope you have a whole lot of fun 🙂