Well, I bet you thought this seven part series was finished. Nope! To be honest … so did I. But then I found I’d actually filmed 8 projects, so today you get a bonus! If you missed the previous video series, you can find the entire playlist HERE.
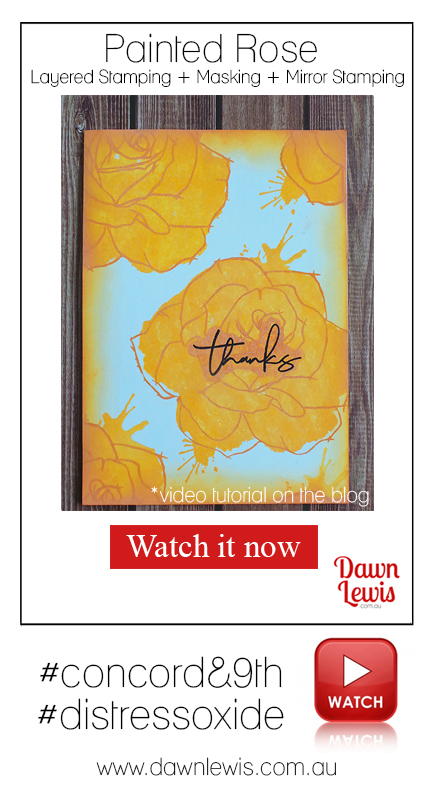
All week I have been featuring the gorgeous Painted Rose stamp set by Concord & 9th, showing different techniques and ideas to get the most from this flexible stamp set (and matching die set). This is combination of 3 techniques that create a single layer card that has plenty of depth.
In today’s video I’m going to show you how I combined kiss stamping, mirror stamping and masking with tone-on-tone Distress Oxide inks.

LESSON 8 – Don’t be afraid to skip a step in the layering process and go straight from the base to the outline. You can create your own custom sentiment mat with this process as well, and I think the reason it works so well with this set is the inks I’ve chosen as well as the fast and loose painterly look of the various elements.
The first thing I did was stamp the large layer all over the card panel, followed by the outline (but without the leaves).
The second thing I did was to learn the hard way that it’s a good idea to stamp with oxides first, black ink last.
This single layer card was fun to make, and I have plans to create a set in different colours, each with a different greeting. I love making card sets … they make great gifts when you present them in a gift box with matching envelopes, a book of stamps and a nice pen.
MATERIALS LIST
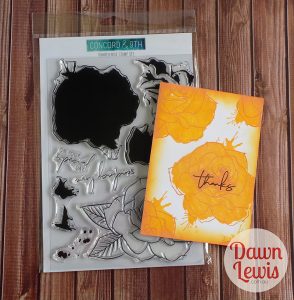
Stamps: Painted Rose, Concord & 9th
White card base (A5, folded in half)
White cardstock, A6
Distress Oxide Inks: Wild Honey + Spiced Marmalade
Ranger Archival ink pad, Jet Black
Mini spray bottle with water
Distress Ink mini blending tool with foam pads
Stamp positioning tool (mini Misti)
Acrylic block
Double sided tape, 3mm
But now … it’s time for today’s bonus video tutorial!
Thanks so much for joining me for this video series … I hope you enjoyed the videos and came up with some new ways to use your layering stamp sets.