Welcome to Day 7 of this seven part video series! Yesterday we explored ways to layer in a totally different way than the set would suggest. If you missed that video, you can check it out HERE. At the end of this blog post there is a surprise for you … so make sure you read all the way to the end!
All week I will be featuring the gorgeous Painted Rose stamp set by Concord & 9th, showing different techniques and ideas to get the most from this flexible stamp set (and matching die set). You’ve probably already seen the photo of todays project and wondered … “Where is the rose?”. I did use the rose, but not in the way you were probably expecting …
In todays video I’m going to show you one of my favourite benefits of having such a large solid layer stamp in this set … mirror stamping!

LESSON 7 – It is possible to use a stamp as a tool, such as I have here. Having a mirror stamp set is nice, but there aren’t many of them around, and sometimes you have to decide if you even like mirror stamping before investing in a set like that. Why not use a large solid stamp to play with the mirror stamping technique?!
The first thing I did was figure out where I wanted my images to be, and do the straightforward stamping.
The second thing I did was to utilise the solid rose image as my mirror stamp so I could create a stamped image that was facing in the opposite direction
This is a technique that needs a little practice, and while the mirror stamped image won’t be exactly as perfect as it’s reflection, it’s a pretty cool trick, and a great way to extend, not only your images that can now face in either direction, but your large solid stamps as well.
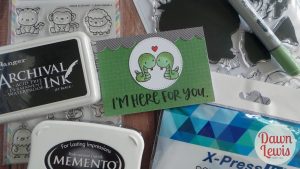
MATERIALS LIST
Stamps: Painted Rose, Concord & 9th + Lunar Animals, Mama Elephant
Dies: 2″ faux pierced circle die
White mini card base (A6, folded in half)
White cardstock, 2″ scrap
Pattern Paper: Kaisercraft, Limelight 6×6 paper pad
XPress It Blending card
Tsukineko Memento Tuxedo Black ink pad
Ranger Archival Jet Black ink pad
Stamp positioning tool (mini Misti)
Double sided tape, 3mm
Sizzix Big Shot die cutting machine
Scissors
Copic Markers
G12, G24, G85, R24
I mentioned there would be a surprise at the end … and here it is … there will be a bonus video tomorrow! When I was editing I found that I’d filmed an entire extra project, so come back and check out the bonus video tomorrow. But now … it’s time for today’s tutorial!
Thanks so much for joining me for this video series … tune in tomorrow for another hot tip and the bonus video to help you get more bang for your buck from your cardmaking supplies.