Every day this week I am going to be showing you how to get the best value from your stamp sets (aka getting more bang for your buck) in this ‘1 stamp set 7 ways’ video & blog series.
My most recent temptation was the stunning Painted Rose stamp and die sets from Concord & 9th. As soon as I saw it I thought of a lot of different card ideas and started making a list of techniques and products that I wanted to experiment with. It didn’t take long for me to realise that this set would get a serious workout … and when it arrived it was everything I dreamed it would be, and more! It was a no-brainer to use it for a video series, so I can show you ways to stretch your stamps for maximum value.
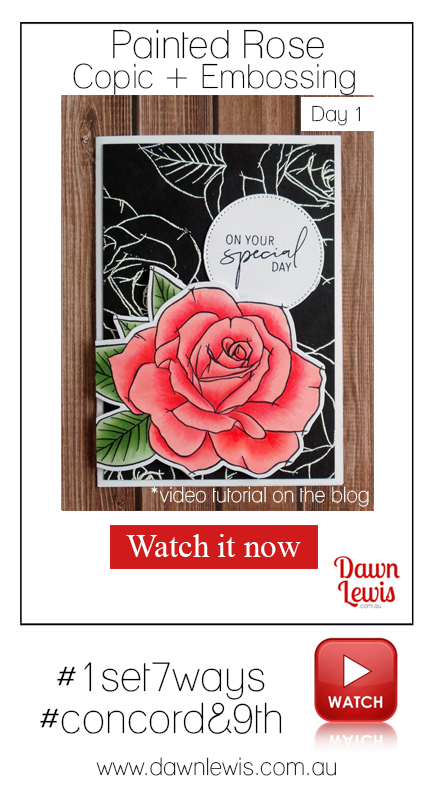
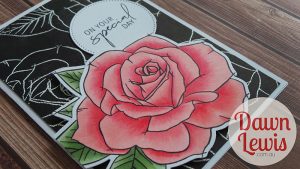
In todays video I’m going to show you how to utilise the rose outline stamp two different ways on the one card. This is something you can do with any outline stamp, but I must admit that the size of this one made it simple to fill the space quickly.
LESSON 1 – Just because this is a layering stamp set, doesn’t mean you have to use the layer stamps all the time. You can use the outline only, and you can use it lots of different ways!
The first thing I did was colour the rose with Copic markers, and I will walk you through the colouring process in the video, specifically the leaf, large petal and centre of the rose. Big stamps take a lot of time to colour with Copic markers, so I didn’t film the whole lot … just the highlights.
The second thing I did was to create a coordinating background by heat embossing the outline rose stamp. White embossing powder on black is very striking, and it helps the hero of the card (the Copic coloured rose) stand out.
I created a second card using a different Copic colour scheme and different embossing powder, to show you how you can take this method and tweak it to the supplies you have on hand. You can see pictures and a materials list for the 2nd project a little further down.

MATERIALS LIST – Card 1
Stamps: Painted Rose, Concord & 9th
Dies: Painted Rose, Concord & 9th + 2″ faux pierced circle die
White card base (A5, folded in half)
Black cardstock, A6
XPress It Blending card
Tsukineko Memento Tuxedo Black ink pad
Ranger Archival Jet Black ink pad
Distress Ink, Embossing (clear)
White embossing powder
Heat Gun
Trimmer
Stamp positioning tool (mini Misti)
Acrylic block
Double sided tape, 3mm
Double sided 12mm foam tape
Anti static powder tool
Sizzix Big Shot die cutting machine
Scissors
Copic Markers
Leaves: YG61, G43 G24, G85
Rose: R20, R30, R32, R43, R35
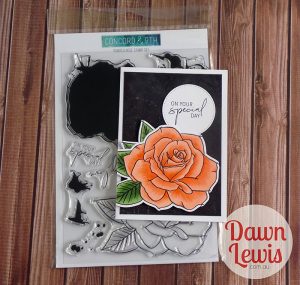
MATERIALS – Card 2
The only difference here is the embossing powder and Copic marker colours.
Ranger Holographic embossing powder
Copic Markers
Leaves: G43, G24, YG61, G94
Rose: YR61, YR01, E95, YR02
Now that you’ve read my first tip for getting the most value from your stamps, let’s start the show!
Thanks so much for joining me for this video series … tune in tomorrow for another hot tip to help you get more bang for your buck from your cardmaking supplies.

Dawn great tips and a really awesome post.