Welcome to Day 2 of this 7 part video series! Yesterday we explored ways to get the best value from your stamp sets by using the outline stamp only. If you missed that video, you can check it out HERE.
All week I will be featuring the gorgeous Painted Rose stamp set by Concord & 9th, showing different techniques and ideas to get the most from this flexible stamp set (and matching die set). This is a large 6” x 8” stamp set, and therefore it does cost more than the 6” x 4” stamp set that we’re used to. However, you get twice the size without it being twice the price, which makes larger stamp sets great value for money. How is it better value? You would pay more for two coordinating 6×4 stamp sets than you will for one 6×8 stamp set. The one large sheet means that designers can create large hero stamps that wouldn’t ordinarily fit on a 6×4 set.
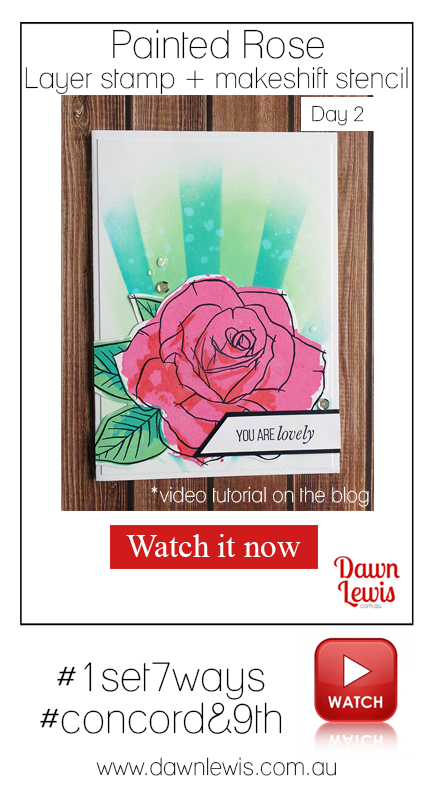
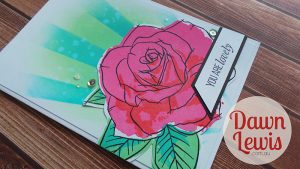
In today’s video I’m going to show you how I used all 3 layers of the rose stamp (flower and leaves). I also used my ingenuity to create the sunburst background without a stencil, by utilising the stamp packaging.
LESSON 2 – While it’s nice to have all the toys, it’s not always realistic. By thinking a little outside the box, you can utilise what you have, thereby saving money on something you might not get much use out of.
The first thing I did was utilise the layering stamps. I used Distress Oxide inks, and I really enjoyed the colour clash effect that these colours created … and strangely, it really works!
The second thing I did was to create a custom background that draws attention to the hero image … the rose. If you have a sunburst stencil, go ahead and use it. I don’t have one, and my Darkroom Door Sunburst Texture stamp isn’t big enough to create the effect I was after. I looked around my desk and realised there was no good reason why I couldn’t just use the stamp packaging to create the rays I wanted for the background. It worked perfectly!
I ended up loving this card so much that I made a few of them. I may end up getting the Darkroom Door Small Sunburst Stencil to make the job easier.
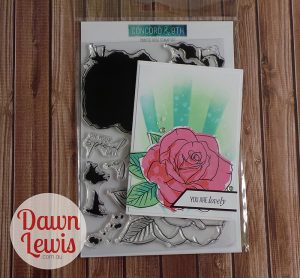
MATERIALS LIST
Stamps: Painted Rose, Concord & 9th
also Majestic AF
Dies: Painted Rose, Concord & 9th
White card base (A5, folded in half)
Black cardstock, scrap
Ranger Archival Jet Black ink pad
Distress Oxide Ink, Picked Raspberry
Distress Oxide Ink, Candied Apple
Distress Oxide Ink, Cracked Pistachio
Distress Oxide Ink, Peacock Feathers
Trimmer
Stamp positioning tool (mini Misti)
Double sided tape, 3mm
Sizzix Big Shot die cutting machine
Silver sequins
Nuvo Crystal Drops, Morning Dew
Option: Sunshine small stencil, Darkroom Door
Now that you’ve read my next tip for getting the most value from your stamps, let’s start the show!
Thanks so much for joining me for this video series … tune in tomorrow for another hot tip to help you get more bang for your buck from your cardmaking supplies.