Hello … welcome to The Craft Room Podcast, talking about one of my favourite products … Copic markers.
Practically every day I am seeing questions about Copic markers popping up in Facebook cardmaking and stamping groups, and the same questions come up over and over again. So today I thought I’d share some information about Copic markers, and answer three very commonly asked questions.
Let’s start with a little background on Copic markers, especially for those who may not be familiar with them.
Copic markers are an ethanol-based ink marker, also known as an alcohol ink marker. They are manufactured in Japan and the very first Copic marker was launched in 1987 … 32 years ago! In 1993 they added the Sketch marker to the range, and in 1998 the Ciao marker was added as a budget entry level marker. Copics are incredibly high quality professional artists markers, and every single marker is hand tested 3 times each in Japan before they are shipped out. Copic markers also have a guaranteed 3 year shelf life, so they won’t go dry if they’re unused for extended periods of time. Before the craft and stamping community discovered them, they were used by architects, technical designers, landscape designers, fashion designers, and then the manga art community. I don’t know who brought them to the attention of the stamping community, but I’m ever so grateful to that person.
One of the most appealing thing about Copic markers is how beautifully they blend, and that’s what stampers, illustrators, designers and artists find them so perfect for creating seamless shadow and highlight. For me, it’s like painting with markers … less mess, no water jar, and no palette full of wet paint for kitties to walk across, and no cleaning brushes! I can achieve shadow and highlight by combining different shades, and they truly bring stamped images to life.
If you’re wondering if I’m at all qualified in the field of Copic markers, I promise I am! I have been using Copic markers for 10 years, I am a Certified Copic Instructor and an Authorised Australian Copic Stockist. This information comes direct from the company that makes Copic markers as well as a decade of experience. I don’t usually have a sponsor, but today I have decided to sponsor myself! If you are looking for Copic markers, re-inkers, information and services, CLICK HERE and I will be happy to help with all your Copic needs.
Probably the most common question that I find myself answering (on a very regular basis) is “What’s the difference between Sketch and Ciao?”. So today I thought I’d dive into the difference between the four different types of Copic markers currently available.
Let’s start with the Wide marker
Wide
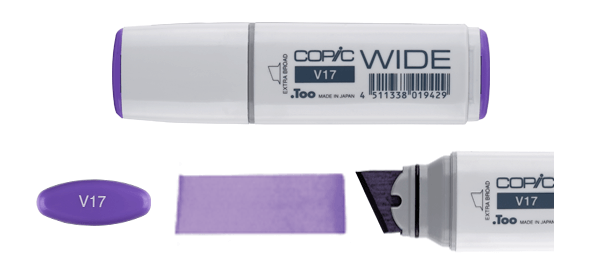
The wide is a single ended marker, which has a ¾” wide chisel nib.
It is available in 36 colours.
The barrel is kind of a short, flat oval shape.
The colour code is etched on the cap, as well as the body.
A wide marker will evenly colour FOUR A4 sheets, then streak for another TWO sheets.
This marker is refillable.
There are 2 styles of replacement nibs available for this marker.
There are empty marker barrels available, though these have been retired, and when current stock is sold out, they will no longer be available.
My guess is that the reason the Wide marker is mostly available in blues, greens and browns is for architects to quickly and consistently colour sky, grass and dirt or wood in their designs.
Let’s move on to the Classic marker, also referred to as an Original marker.

Classic
The Classic is a double ended marker, which has a chisel nib and fine bullet nib.
It is available in 214 colours.
The barrel is square.
The colour code is etched on the caps, as well as the body.
A Classic marker will evenly colour FIVE A4 sheets, then streak for another ONE sheet.
This marker is refillable.
There are 9 styles of replacement nib available for this marker.
There are empty marker barrels available.
The Classic marker is compatible with the Copic air brushing system.
Now let’s move on to the very popular Sketch marker
Sketch
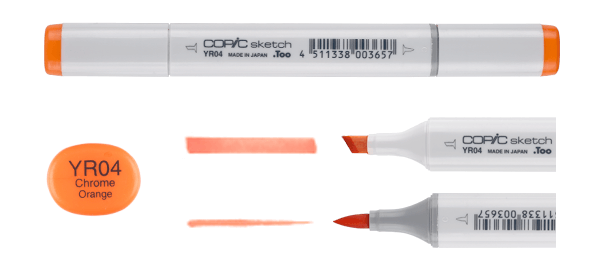
The Sketch is a double ended marker, which has a chisel nib and super brush nib.
It is available in all 358 colours.
The barrel is oval.
The colour code is etched on the caps, as well as the body.
A Sketch marker will evenly colour FOUR A4 sheets, then streak for another 3/4 sheet.
This marker is refillable.
There are 4 styles of replacement nib available for this marker.
There are empty marker barrels available.
The Sketch marker is compatible with the Copic air brushing system.
Lastly, let’s talk about the Ciao marker
Ciao
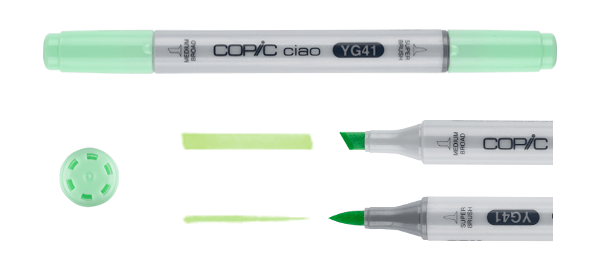
The Ciao is a double ended marker, which has a chisel nib and super brush nib.
It is available in 180 colours.
The barrel is round.
The colour code is not etched on the caps, but is etched on the body larger than other markers.
A Ciao marker will evenly colour THREE A4 sheets.
This marker is refillable.
There are 2 styles of replacement nib available for this marker.
Empty marker barrels are not available.
The Ciao marker is not compatible with the Copic air brushing system.
Ciao markers have a child-safe cap.
All markers
Now that we’ve talked about the specs for each style of marker, let’s discuss the most common question … “What is the difference between Sketch and Ciao markers?”.
Sketch markers are more expensive than Ciao markers. This is because the Sketch marker holds more ink than a Ciao marker. At the heart of it, the Ciao marker is an entry level marker, for those who want to try them out without committing to Sketch markers straight away.
Sketch markers are available in all 358 colours, whereas the Ciao marker is only available in 180 colours. I started building my collection with Ciao markers, and there are plenty of natural colour blending families available in the Ciao range. But there did come a point where I wanted to add in extras, or try different colours, and I started filling in the blanks with Sketch markers.
Sketch markers are oval, and Ciao markers are round. When I first started using Copic markers, a lot of blogs (and sales people who were obviously reading those blogs) stated that a major flaw in the Ciao marker was that its round barrel meant it would roll off your desk much more readily than a Sketch marker. In my personal experience, I’ve found that to be untrue. The Ciao marker lids both have a little bump on the edge, and these are extremely effective at making sure your Ciao markers don’t roll about everywhere. In fact, I’ve had Sketch markers roll off my desk much more frequently than Ciao markers … so I think we can put that Copic myth to bed! When it comes to barrel shape, I confess that I prefer the feel of the oval Sketch barrel in my hand to the round Ciao, but it’s by no means a deal breaker.
Sketch markers can be used with the Copic air brushing system, but Ciao markers cannot. I would say, unless you plan on doing a lot of air brushing in your art work, this also is not a deal breaker. Very few casual crafters even own the air brushing system. I have one … it’s fun to use, but I rarely break it out for a card making project.
Let’s talk about the ink inside these markers. It doesn’t matter if it’s a Wide, Classic, Sketch or Ciao marker … the ink inside a B29 in any of these styles of marker is exactly the same, and they are all refillable. You could take one B29 re-inker, and fill a B29 Wide, a B29 Classic, a B29 Sketch and B29 Ciao … non problems at all! The other thing is that these ink formulas have been the same since day dot. You can refill a marker you bought 20 years ago with a re-inker you bought yesterday, and they will be perfectly compatible. And let’s talk about the cap colours. Did you know that they are dyed with the same ink formula that’s inside the marker? True story! Sure, the ink doesn’t always translate to the material in the lid as the ink inside shows on cardstock or paper, but in my experience most of them are accurate.
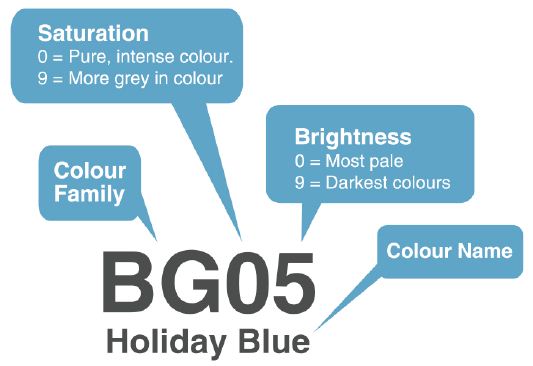
The second question I wanted to answer today is about the codes on the markers. We are used to seeing colour names on our craft supplies, so many don’t pay much attention to the codes on Copic markers. Sure, every marker has a colour name, but short of Light Prawn and Eggshell White, I really don’t remember any others. That’s because the codes are the more important thing, so that’s how I identify my markers.
Every marker has a unique code. It starts with one or two letters, and has two, three or four numbers after that.
Let’s start with the letters. They indicated the colour family that the marker belongs to.
R = Red
YR = Yellow Red
Y = Yellow
YG = Yellow Green
G = Green
BG = Blue Green
B = Blue
BV = Blue Violet
V = Violet
RV = Red Violet
… which takes us full circle around the colour wheel. Additionally there are
W = Warm Grey
C = Cool Grey
N = Neutral
T = Toner
… which are all varying shades of grey. Lastly there is
E = Earth Tones
F = Fluorescent, usually followed by the colour code, for example FRV1 is a fluorescent pink.
Next, let’s talk about the numbers. In most cases there are two numbers, and the only exception to this is for incredibly pale colours which can have three or four zeros. But we’ll come back to those later.
The first number is an indicator of colour saturation in the marker. In other words, how pure is the pigment is in this marker. The lower the number, the brighter the colour. It’s going to be a very pure blue. The higher the number, the more grey will be added to the blue in that marker. It’s going to be muted. So if you’re looking at B05 … the ink is blue, and it is very bright blue. If you are looking at B95 … the ink is still blue, but it is a very muted greyish blue.
So if you are into bright colours, look for lower middle numbers. If you prefer more muted tones, look for markers with higher middle numbers.
The last number is an indicator of colour brightness in the marker. In other words, how much colour is in this marker. The lower the number, the paler the colour. It’s going to be a very pale blue. The higher the number, the more pigment is in there, so it’s going to be a very strong glue. So … if you are looking at B00 … the ink is blue, and it is very pale blue. If you are looking at B06 … the ink is blue, and it is a much darker blue. When a marker has three or four zeros, the additional zeroes are counted as the last number, and you know they are going to be super, super pale.
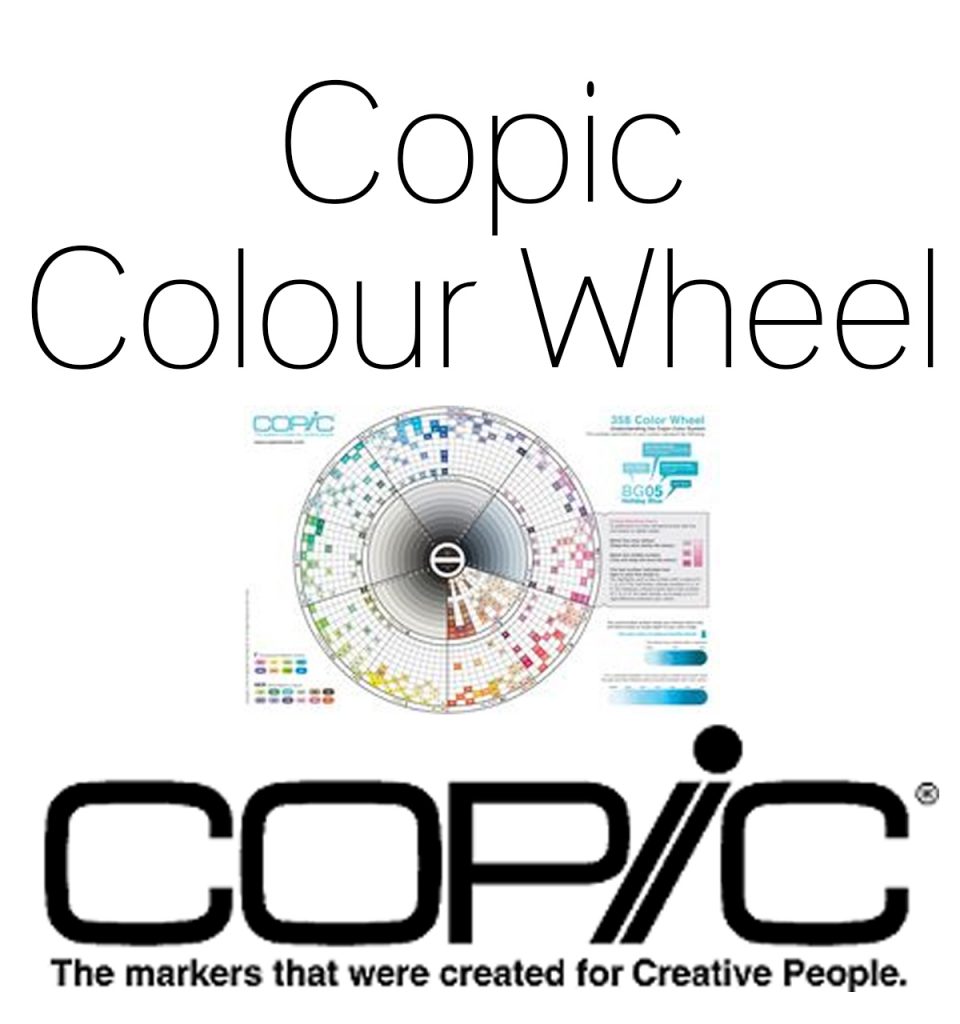
The best way to see the way the colours work is to look at the Copic colour wheel HERE.
When you look at the colour wheel, most colours follow the same rule. The colours around the outside of the wheel have low first numbers, and they are bright. The further toward the centre you get, where the first number is higher, the colours become more muted, as more grey is added to the mix. But when you follow the colours around their line from left to right in their colour wedge, the last numbers get bigger, and the colours are darker. In the centre of the colour wheel are the Earth tones and greys. The Earth tones are the one grouping that don’t follow logic when it comes to the codes. Browns are mixed from all sorts of colours, and sometimes the combo’s don’t make logical sense like the colours on the outside of the colour wheel. They do make sense along their lines, though, and there are some amazing shades and combos you can put together by mixing up your Earth tones.
When choosing colours to work together, especially when beginning, a natural colour blending family will have the same letter, and same first number. The secret to a good blend is in those last numbers. Look for numbers that are close together … one to three digits apart. The closer those last numbers are together, the easier it is to create a seamless blend. The further apart those numbers are, the more ink and effort will be required, and they may not blend at all. There are methods you can use to blend markers that are far apart, and sometimes you need those methods because you don’t have the marker you need, or it simply doesn’t exist.
Of course, you don’t have to stick to natural colour blending families. There are so many ways you can combine markers, and I often mix up different colour groups to get the shades I want. But when starting out, and choosing your first markers, a natural colour blending family is a simple way to start.
If you are drawn to the colour names, by all means, memorise them and use them. But the codes contain so much information that it’s important to understand them and use them to build your Copic collection if you want to achieve great shading.

The last question I see frequently is regarding the 0 Colourless Blender. There’s generally just a lot of confusion around it, because it doesn’t act the way we’re used to a blender pen acting. This is because, contrary to it’s name, it is not actually used for blending. It is simply a pigment-free version of the same ink that’s in every Copic marker. It can actually do some pretty amazing things, and I recommend that every Copic colourist have this marker in their collection.
Essentially it will push the other inks around, and can desaturate something you’ve already coloured. So … if I make a mistake and colour outside the line (which I do A LOT), I can use my 0 colourless blender to push that ink back across the stamped line. If you colour over a Copic coloured section, it does not erase the colour, but it will desaturate it somewhat. You can create special effects and use the 0 colourless blender ink, either in a marker or from a re-inker, and I include this in my Copic classes.
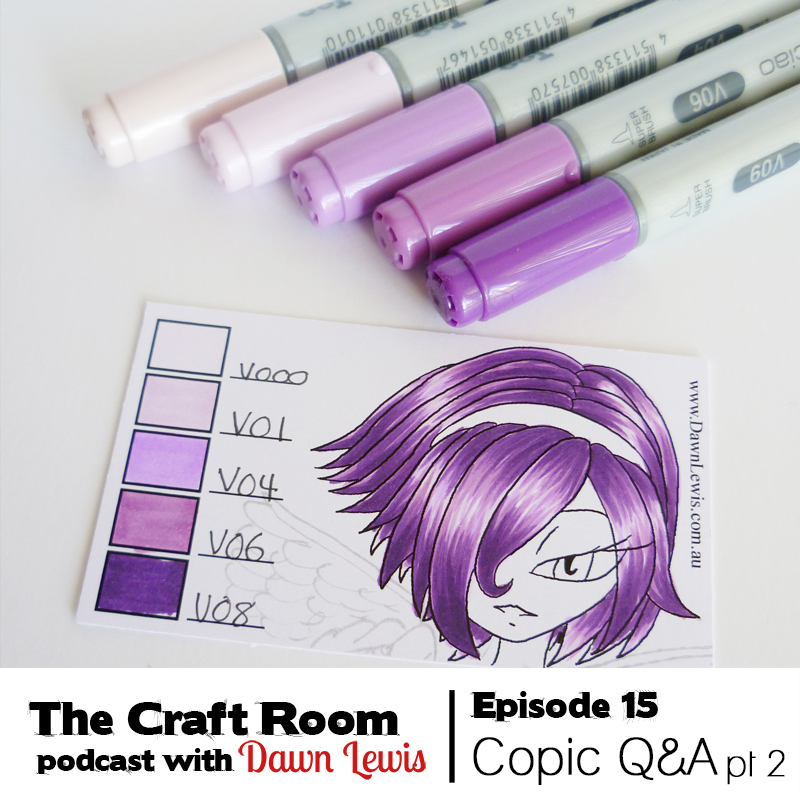
There are a few more questions I want to address, but I think that’s enough information overload for today. Episode 15 will be part 2 of this Copic Q&A, but if you have a burning Copic question in the meantime, please feel free to email me or drop me a PM via Facebook or DM via Instagram … happy to help with your Copic conundrum! A reminder that if you are looking for Copic products in Australia, you can head to dawnlewis.com.au/copic and I will be delighted to help you find what you’re looking for. I hope you will join me for the next episode as we wrap up this two part series with more answers to frequently asked Copic questions.
